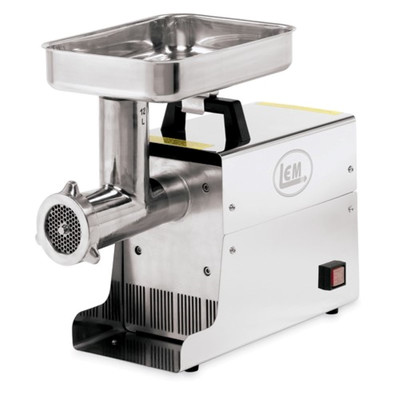
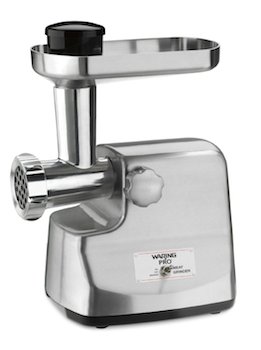
People choose to grind meat at home for a variety of reasons. The flavor, texture and freshness that home-ground meat provides is unbeatable, and the control over what goes into your ground meat guarantees that you are never eating food that is past its prime. You also avoid the chemicals and additives that are found in ground meat from the grocery store.
Some people choose to grind meat with a food processor, and some people chop it by hand, but getting a dedicated grinder is without question the most practical option. Most people don’t want to waste their time putting in hours of manual labor to grind meat, so they choose a meat grinder. The problem is that people often have no clue what to do when they finally buy a meat grinder for their home.
If you’re new to grinding meat, we know that the process can be confusing, but if you follow our tips, you’ll be grinding like an expert butcher in no time.
The first thing that you need to realize is that there isn’t much to it when it comes to grinding meat. Basically, you need to assemble the grinder with the plate that you want to use; different plates will give your meat a different texture. When your unit is assembled, you need to make sure to trim your meat well. Grinders tend to get stuck on tendons and other connective tissue, so make sure that you trim all of that stuff off of the cut of meat that you’re grinding.
When your meat is trimmed, you feed it into the hopper. Turn the unit on, and press the meat through with your pusher. The pusher usually comes with the unit; it’s a tool for pushing your meat without having to worry about sticking your hands and fingers in the grinder. If your grinder didn’t come with one, you can use a large spoon, block of wood or anything that you find around the house. Just make sure to keep your fingers clear of the hopper.
With that being said, there are a few things you can do to make your grinding easier:
Keep Your Meat Cold – Keeping your meat cold is one of the most important aspects of grinding. If you try to grind warm meat, it’ll squirt, smear and the meat’s fat will gunk up your grinder. Warm meat tends to produce a pulpy and dry product that has the texture of baby food, and unless you’re into that, we definitely don’t recommend it.
We go as far as putting some of our meat grinder parts in the freezer for an hour before we start the grinding process. The hopper, blades and screw can all go in the freezer, but if you have an electric unit, you don’t want to put the base in there. Put your meat in the freezer for at least 15-20 minutes before grinding, and leave it in there until you are ready to start.
Make Sure To Trim Your Meat – If gristle and tendons get stuck in your grinder blades, they wrap around the blades and make them dull. When this happens, meat isn’t cut up by the blades; it’s mashed up and forced through the holes in your grinding plate. If this happens to you, it’ll produce an unappetizing mush.
The easiest way to prevent this is to trim your meat before you throw it in your grinder. Cut off all the skin, tendons and connective tissue, and then make sure to cut your meat into chunks that will fit into your hopper easily. You don’t want to be forcing a large cut through your hopper because it’ll change the texture of your meat.
Keep An Eye Out For Smearing – Always watch your meat as it is coming out of your grinder; it should be coming out of the cutting plate smoothly, and it’ll look like little pieces.
If it starts looking funny, stop the grinding process; smeared meat looks wet and collects on the plate instead of falling into your bowl. If you can stop the grinding process fast enough to unclog the grinder, you won’t ruin the ground meat that you have already processed. You need to pay attention to make sure that the blade inside of your grinder isn’t clogged. It makes the process quicker and more efficient.
Keep Your Unit Clean – When you use your unit, you always need to clean it as soon as you are done with it; it’s not something that can be put off for a later date. Allowing meat to dry up and get stuck to the inside of your machine is a good way to get sick from the germs and bacteria that form on it.
Wash your blades, screw, hopper and cutting plates with warm soapy water, and always make sure that you don’t see any meat residue on your parts. It only takes a couple of minutes to clean your grinder, and when you do, you never have to worry about bacteria and germs.
Pay Attention To Your Blades – The great thing about meat grinders is that their blades tend to stay sharp for a long time; the grinding process causes friction, and this preserves the blades.
This is great, but you still need to get your blades sharpened professionally about once a year. If you let your blades get dull, they’ll start to mash your meat instead of grinding it.
As you can see, grinding meat isn’t that hard of a process. You simply need to follow our tips to make sure that the grinding process goes smoothly. We realize that grinding your meat can be overwhelming at first, but if you take it slow and concentrate on what you are doing, you’ll get the hang of it within a few minutes of starting. So, now that you have a grinder and you know how to use it, get ready to impress your friends and family with the butcher quality meat that you’ll soon be producing.


